Create the best ceramics tiles | Overland Ceramics.
Create the best ceramics tiles | Overland Ceramics.
Large format tile makes a dramatic statement in any space and are commonly chosen in both wall and floor applications to give a clean and modern look to a large area. While large format tiles are a great way to provide a modern look to a large space, they do come with their own set of challenges where installation is concerned. If you are thinking about using these tiles in your space, there are some quick tips that can help you avoid any issues in advanced and achieve the look of professional installation.
Large format tiles come in an array of sizes and shapes, starting with 16-inch by 16-inch square tiles and including ranging up to huge rectangular tiles and tile panels that measure 5 feet by 10 feet. Many of these tiles are also thin porcelain tiles. These large tiles are desired for a variety of reasons, including:
Enhanced Coverage
Because they are so large in shape, these tiles provide greater coverage in less installation time, making it easy to achieve a huge install without creating a visually busy or disruptive look.
Less Maintenance
Fewer grout lines can result in a lower-maintenance wall or floor installation. Grout has a tendency to chip away or crack over time and minimizing those grout lines make it easier to maintain.
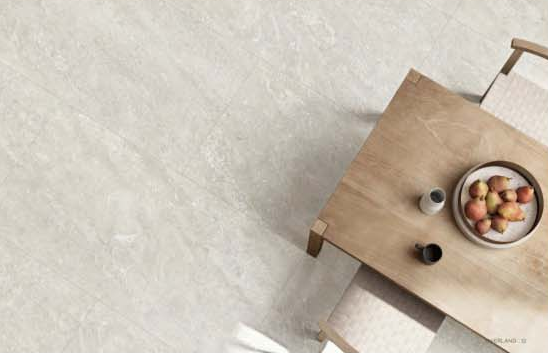
Create a Modern Look
The large and sleek design of these tiles results in a modern look for the space, especially when the same tiles used for the floor are extended to the wall. Before you extend wall tiles to the floor or floor tiles to the wall it is important to understand what makes tiles suitable for wall or floor application.
Minimal Grout Lines
Naturally, large tiles require fewer grout lines because the tile itself provides more coverage.
Carpet and vinyl plank flooring can allow for some imperfections when it comes to the subfloor. Large format tile made of porcelain or stone are not as forgiving. Proper preparation for any large tile installation begins with ensuring that the subfloor is entirely level. Most subfloors will not be level. When this is the case, use a self-leveling material to prepare the substrate for the needs of the tile. When you live in an area that experiences extreme temperature changes in the summer and winter months, additional steps may be necessary.
The cost of the tile itself is only the beginning. To properly budget for the project at hand combine the cost of the of the tile with the projected cost of the demolition of the current flooring, the preparation of the subfloor, any additional installation materials, and the cost of labor if you plan to hire professionals. Although this is not technically a tip for the installation itself, it will help you keep your project on track and ensure a top-quality finished product.
The larger the tile, the easier it is to have lippage if the subfloor is not completely level. Lippage is the term for two tiles that are installed next to one another aren’t completely level with one another and the edge of one stands slightly higher than the edge of the other. The main danger of lippage is that it is easy to trip on the higher tile. Preventing lippage starts by prepping the substrate properly and making sure that the mortar is laid evenly.
Traditionally, porcelain tile is adhered to the substrate with thinset. The variance in thickness from a traditional porcelain tile to a large-format tile means that a different mortar needs to be used. Instead of using thinset, opt for a medium-bed mortar. Thinset has a natural tendency to shrink as it dries, which isn’t a problem when adhering smaller tiles. Medium-bed mortar resists shrinkage, making it a much better choice for under the more expansive tiles. This mortar should be applied to both the back of the tile and the substrate to ensure a secure bond.
Large tiles are more likely to experience cracks than small tiles. With a little preparation during the installation process, you can help to prevent cracks from occurring in the first place and help you avoid repairs down the road. Adding a crack isolation membrane between the substrate and the tile.
This membrane will help to act as a buffer between the tile and the subfloor so that the natural expansion and contraction that occurs in the hot and cold months doesn’t directly result in a crack to the tile itself. This membrane won’t necessarily protect the tile from cracks that occur because something was dropped on the tile.
Hot Line: 020-22818328
Customer Service: 400-678-6206 / E-mail: Master@weyes.cn
Office Add: The Entire Floor Of 5af And 30f Of Xingguang Yingjing Building, No.117 Shuiyin Road, Yuexiu District, Guangzhou City, Guangdong Province
Copyright © 2021 Guangzhou Weyes Network Technology Co., Ltd. | All Rights Reserved